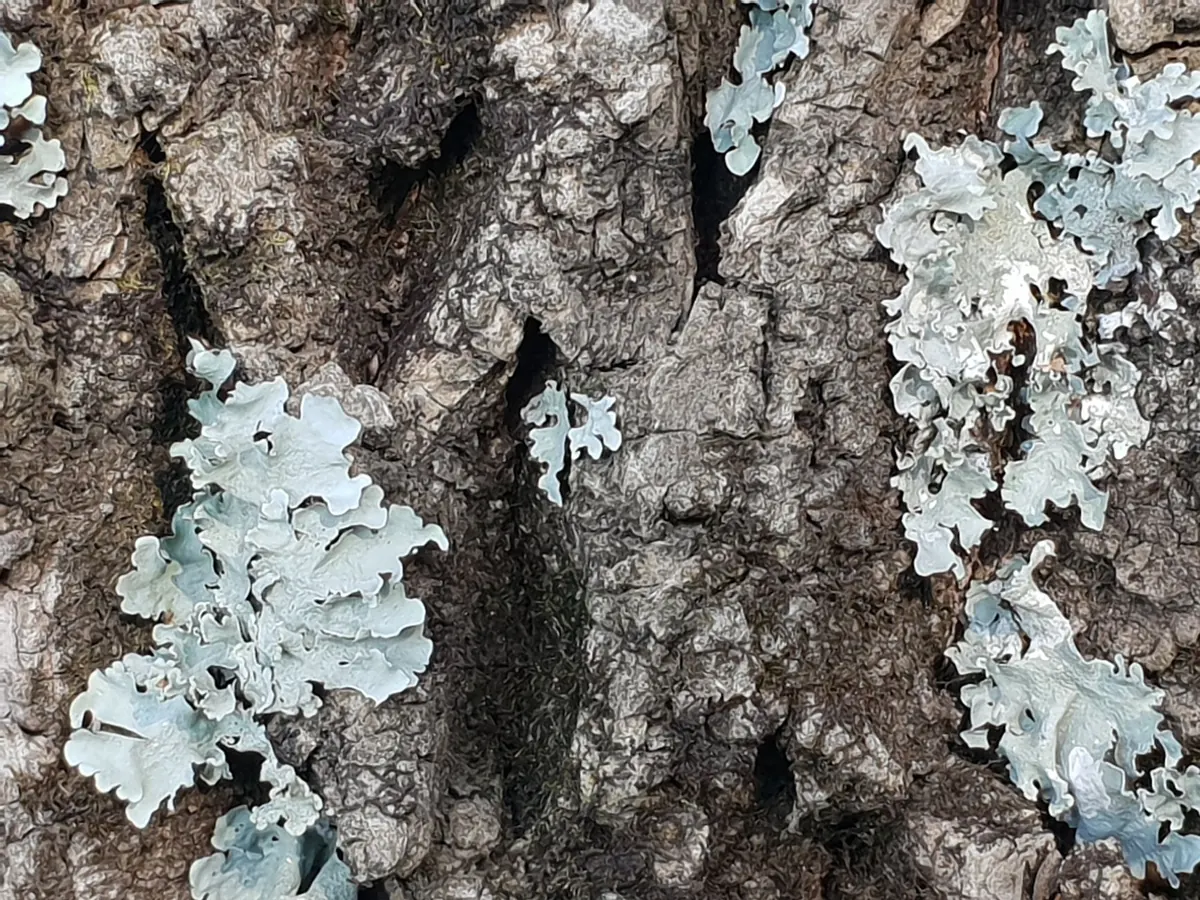
Most photographers walk into a forest looking up. The canopy holds the obvious drama: light spilling through leaves, the geometry of branches, a bird on a dead snag. Yet some of the strongest abstract images in any woodland sit at chest height, and they don't move. Bark and lichen give you texture, rhythm and colour you can study for an hour without the subject shifting a millimetre. The trick is to stop photographing the tree and start photographing the surface.
First, Change Your Unit of Attention
Give yourself a small territory. Pick one trunk and work within roughly two square metres of it for twenty minutes. That constraint does more for your eye than any lens.
Start by hunting for repetition: a run of vertical ridges, a scatter of pale dots, the regular crackle of plates. Then look for where the pattern breaks — a knot, an old scar, a curl of bark peeling away, a bright patch of lichen on dark wood. Repetition tells the eye what the rule is. The interruption tells it where to look. Most abstract bark photographs are built on exactly that relationship.
Ask two questions as you scan the surface. What is the smallest shape here? What is the largest? When both live in the same frame, a close-up starts to read like a landscape instead of a specimen.
Read the Surface Before You Shoot It
Smooth bark
Beech, hornbeam and young maples have skin rather than armour. The texture is subtle: faint horizontal lines, small scars, a soft sheen that shifts as you move. These trunks reward low-angled light and work well as quiet, near-monochrome images. A polarising filter helps you control the sheen.
Fissured and plated bark
Oak, ash, pine and sweet chestnut offer deep valleys and hard ridges — high-contrast material. Light from the side turns the cracks into black lines. Light from the front flattens the whole thing into mud. Plated bark, such as sycamore, gives you bigger shapes that read well from a little further back.
Peeling bark
Birch, madrone and many eucalyptus shed in curls and papery strips. Look for edges: a lifted flap catching light against a shadowed gap behind it. Thin material like this responds beautifully to backlight, where it glows translucent.
Encrusted surfaces
Old cherry, apple and sycamore, plus stone walls and weathered fence posts, carry the lichens and moss that make bark photographs sing. These are slow-growing organisms and some are sensitive to disturbance, so keep your hands, bags and tripod feet off the surface and leave everything attached where you found it.
Side Light Does the Heavy Work
Texture is a story about shadows. Flat, frontal light erases shadows — and with them, the texture you came for. What you want is light travelling almost parallel to the surface, skimming across ridges and dropping into cracks.
In practice that means early morning, late afternoon, a low winter sun, or simply walking around a trunk until the light rakes in from one side. In a forest you often have to work for it, because the canopy breaks light into patches. A trunk that looks dull from one position becomes sculpted three steps to the left. Move your feet before you touch your settings.
Overcast days give even light and rich colour: excellent for lichen, weaker for depth. Use them, but compose for shape and colour rather than relief. After rain everything is darker, more saturated and more contrasty, and wet bark holds colour that dry bark loses. A polarising filter cuts glare on wet surfaces and lets that colour through, though it can also kill the highlight that makes wet bark look wet. Take one frame with it and one without, then decide.
Get Close and Stay Sharp
A macro lens in the 90–105mm range is the easy route: it lets you work at a comfortable distance and keeps your shadow off the subject. Extension tubes on a standard lens, or the macro mode on a compact camera, will also get you there.
Depth of field collapses as you magnify. At high magnification you may have only a few millimetres in focus, which is why so many close-ups look soft in the wrong places. A few habits fix that:
- Use a tripod, or brace the camera against the trunk and rest it on a beanbag.
- Focus manually with live view magnified, and place focus on the most important ridge or lichen edge.
- Work between about f/8 and f/11. Apertures beyond roughly f/16 bring diffraction and lose more sharpness than they gain in depth.
- Use the self-timer or a remote release; even a two-second delay removes the shake caused by pressing the button.
- If the subject is flat and parallel to the sensor — a wall of lichen, a sheet of birch bark — shoot several frames at different focus points and combine them later.
- Keep ISO modest, around 100–400, and shutter speed at 1/125s or faster for handheld close work.
Compose It as an Abstract
Once the surface is sharp, the picture still has to be designed. Four moves do most of the work.
Fill the frame. Eliminate sky, ground, branches and moss at the base. Every piece of context you leave in pulls the viewer out of the texture and back into the forest. The moment the frame contains nothing but surface, the subject becomes pattern.
Choose a dominant direction. Vertical ridges, horizontal cracks, the diagonal flow of a stain or water mark. Pick one and let it run, or set another direction against it in a corner for tension.
Leave one interruption. A knot, an insect hole, a colour shift, a single bright lichen. One is enough. Two competing focal points turn a strong abstract into a busy record shot.
Play with scale. A tight frame of cracked bark can read as a dried riverbed, a cliff face, or skin. Don't name it for the viewer. Let them wonder whether the subject is large or small — that ambiguity is what makes a texture photograph abstract rather than documentary.
Check the corners before you fire. Cracks and lichen edges create busy frames, and the eye notices a truncated shape at the edge far more than one in the middle. Shifting a centimetre usually improves the composition.
A Simple Field Routine
When you want to practise rather than wander, run this sequence on a single tree.
- Walk slowly and scan trunks at chest height. Stop at the first surface that makes you look twice.
- Stand still for a minute. Identify the pattern and the interruption.
- Circle the tree and watch how the light changes. Choose the angle where shadows have direction.
- Set up, focus manually, and shoot three frames: the whole patch, a medium view, and an extreme close-up.
- Change one variable at a time — aperture, angle, distance. Review at full magnification, not on the thumbnail.
- Before you leave, check that you haven't scuffed lichen off the bark or crushed moss beneath a tripod leg. Growth takes years; your visit should leave no trace.
You don't need an old-growth forest for this. A single oak in a park, a plane tree on a city street, a lichen-covered wall on the walk home will all do. The photographers who make compelling bark abstracts are rarely the ones who travel furthest — they're the ones who return to the same trunk in different light, season after season, until they know its cracks the way they know a face.
Photo: Magda Ehlers / Pexels